
Oakville and the surrounding areas have many new homes that are painted “builder’s beige”. This paint is very difficult to clean and flat. Our clients frequently ask us, “Do we really have to wait a whole year to paint?” My quick answer is NO
Your home should reflect you and your family. Colour is a great way to personalize your home. Your home will feel more like home if you choose a color palette that is true to your personality.
It’s also a common question I get: what rooms are the most important, and which colors to start with? These are my top tips for making a big change in your home, new or existing.
PROTECT YOUR ROOM
Before you begin to paint, remove all furniture from the area. Next, cover it with drop sheets and heavy-duty plastic. You will need to sand the wall to prepare it for paint. Paint can splatter and cause mishaps so be careful when protecting furniture and flooring.
Take out all electrical covers and switch plates. Also, remove any attached items like pictures, ornaments and hooks clips. Once you’ve chosen the colour, you may need to put plaster in the holes and re-arrange your artwork or pictures.
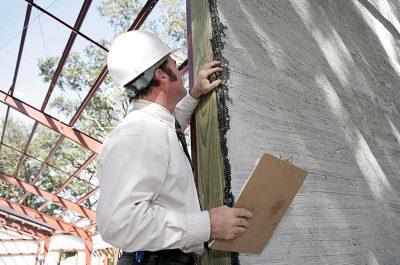
TEST THE WALLS
To ensure it is a latex paint, test the walls. The paints of today are less volatile than the oil-based and alkyd-based home. This means that the new eco-friendly paints won’t adhere to old surfaces. Instead, they will require a latex base to ensure adherence and coverage. Multi-purpose paints are required if oil is detected in pre-existing paint. Newer paints are very easy to use and have a low odour.
Fix ANY DAMAGE
Fill any cracks or holes between the wall and your woodwork. You can find many products at local Benjamin Moore and Sherwin Williams paint stores, Home Depot, Rona, Lowes Building Centres and Rona that are suitable for this purpose. Premix plaster is easy to use, and it doesn’t require you to mix powder with water to get a consistent mixture. Acrylic caulking can be used to fill gaps between the baseboard doors and windows. It does not contain silicone, as silicone will stick to paint. Next, smoothen the plastered areas using either a fine or medium sanding pad or a 100 grit or120 grit folded piece sandpaper. These can also be found at the above-mentioned stores.
After all repairs are complete and dry, prime the wall or woodwork surface to ensure the best coverage before applying the first coat. Walls alive exterior painting in oakville uses a durable primer with fewer V.O.C. Volatile organic compound (VOC) has a low odour. You can also try newer paints that are 100% acrylic and have zero v.o.c. You can choose from a range of finishes, including semi gloss, eggshell, matte, and eggshell. They are also available in self-priming and spot priming with a brush or roller. It will all depend on the extent of the repairs needed in the room.
PREPARED TO PAINT
Now you can paint the room. Start by cutting or edging from top to bottom with a nylon brush that is 2 1/2 inches in width. To ensure a uniform coverage of paint on ceilings and walls, apply the paint one at a time. Dip the brush in half of the paint can to achieve successful cutting and edging. To ensure that you don’t drip, tap the excess paint off the can. Next, apply the paint to the ceiling. Then use the brush to create straight lines by moving the brush sideways. You can use low adhesive tape to attach the ceiling or a painting aid tool at your local paint shop if you have trouble getting a straight line.
After you have completed these areas, you may apply a coat to the trim and woodwork before applying the second coat. This will ensure that the paint is applied evenly and straight lines are maintained. By the end of the day, your room will be beautifully painted with a new color that best suits you.
Although we have provided clear steps to help you paint your rooms, we understand that it can be hard to find the time or energy to do a home remodel. We can help you leave the project in the hands of professionals.


